* This is clearly a spoof on The Julie/Julia Project. All the quilts below, however, are the real deal.

Thursday, September 9, 2010

Month 7 Duck & Ducklings

So you can see it's been almost a month since I last updated this blog and here we have a fun and easy square. Duck and Ducklings. I have no hints or tips for this block. I DO have samples to show:


Saturday, August 14, 2010

Block 6 - Courthouse Stars


I don't see stars, I see a flower. I also see mistakes in the pattern, so do this! (I have made 4 of these so I know of which I speak.)

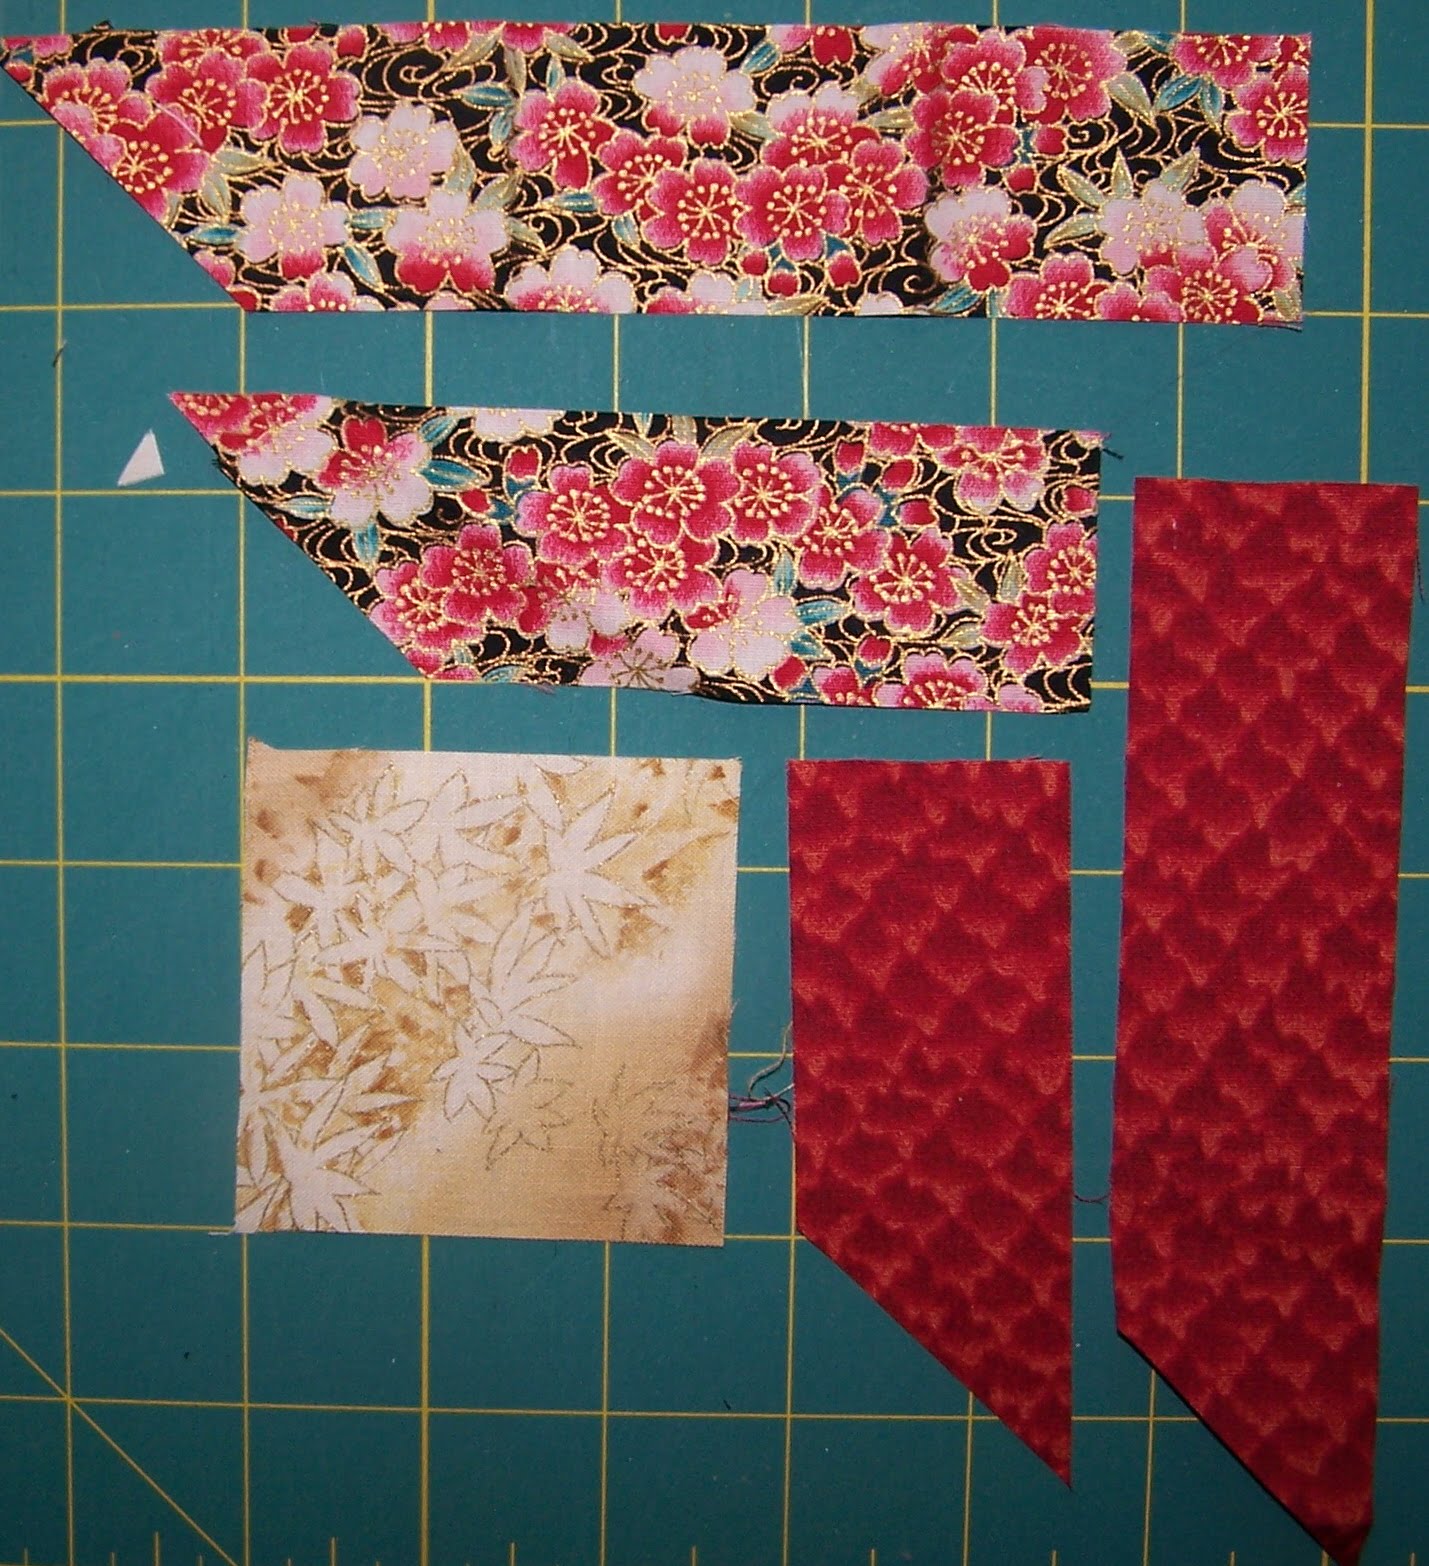
First, let's cut out the fabrics. EQ5 has you cut out 3 "C" Sets of 1 1/2" x 6 3/4" strips for each petal of this flower. I don't see the necessity of all that sewing so I cut 1 rectangle of 4" x 6 1/2" of each of the 4 colors/petals (I also don't get the 6 3/4". It should be 6 1/2") To prove this I shall cut ONE, the red petal using the EQ5 6 3/4" measurement and show you what happens.

It also has you cut out an unnecessary "M" piece. DO AS I SAY>>>>>> Cut 4 sets of "E", "F", "G" and "H". Trust me!

Square "N" says 3 5/8". NO NO NO! Cut it 4" square.

Then cut out the remaining strips as indicated. Be very carefully to cut out EXACTLY as the pattern says, being certain you trim the 45 degree angle going in the right directions. If you mess this up, nothing will sew together right.


__________________________________________________________-

Now after you have cut ALL your pieces, set them up as shown on the illustration. You will have a much happier time of it if you see any mistake before you sew it.


I use this handy tool by Jinny Meyer to mark an accurate 1/ 4" starting/ stopping point, that and a mechanical pencil. Mark on back of the top piece of fabric when you go to sew; It makes life easier than guessing where to start and stop.


Let' s start by sewing up one corner.


This one this is basically courthouse step or log cabin.
With the shortest strip and center square, align the two fabrics


and mark the 1/4" at the 45 degree angle. This is your stopping point. You need to leave that 1/4" open to be able to "turn" the corner and sew the other angled fabric properly. Now sew the two together starting at the 90 degree and stop at that mark you made.

Finger-press and do the same with the other color fabric. That strip is "E". At this point, you can iron if you like.


Ironing is always alittle tricky with Y-seams. I show you the back so you can see how press the seam allowances.

Return to the first color and sew the next angled strip, "F". This time, sew top to bottom, all the way. No need to worry about 1/4" marks. And repeat this with "G". You should have something like this!

As you can see, sometimes the "logs" don't end perfectly but don't be overly concerned.


Place the two "leaves" (A and D) together and mark the 1/4" Start/Stop point as shown.


START at the mark and sew to the end. This is the outer corner of the final block. Finger-press open.

I open up the leaves to expose the allowance here.

Now leave the leaf facing up and align the center to the leaf.

Mark the Start/Stop points and begin sewing at the junction of the petal fabric and STOP at the mark. You need to leave that space at the beginning, again to do a turn later.

Now "flip the fabric over and align the other "leaf" to the center square.


Begin at the corner Start/Stop mark this time and STOP at the junction of the petal fabric, once again, leaving that 1/4" to add the triangle.


After you press, the block you should have this:


Mark the 90 degree corners on the back of the triangles "B"

and using the same techniques described above, sew in the triangles.

You should have this:


It SHOULD measure 6 1/2" square. If something is off, check your seam allowance. If it is larger, trim it down. If it is too small, start over.
Trim the "ears" and make the other three as above.

Now, you see you have a simple 9-patch.


And once you've sewn that, you have this:

See what I meant about the 6 3/4" "C" RED rectangle? Trust me. It should measure 4" x 6 1/2"

TIPS:

1. When sewing a Y-seam, avoid sewing into ANY seam allowance. Pull the seam allowance to the side as you sew. Otherwise, you will not be able to make a smooth "turn".
2. Trim away thread. It gets confusing to see all the threads everywhere
3. Use a small stitch but not tiny, Those are hard to rip out.
4. RIP if you make a mistake. You will make many at the beginning. but Start Over before you compound a problem. THEY NEVER just sew away. They do get crazy worse, however. Don't go to the crazy.

Now, THAT wasn't so bad, was it?


Friday, July 30, 2010

A Few Thoughts

Okay we are now coming to where life gets challenging..... starting next month (next block) we will mess with the pattern to simplify things.

It is here that I took my long pause in working on this project back in May. We have a small farm and the vegebeds took me away from focusing like a laser (ha!) on this endeavour. I had made the one back in February and thought at the time... "hey, you better make that huge center square before you use up all the big chunks of fabric you have to work with!"

That was a wise decision. And I made all 6 of them before I picked up the Courthouse again in early May and finished another one, the RedWhiteandBlues. I thought, as long as I have the fabric out, let me just focus on finishing the whole quilt. So I did BUT that was not how I intended to work though the "project". The idea was to make a series, the same block many time over to learn the intricacies of each well.

The thing is, with me, as time goes by, I tend to forget things. I mean to write them down and am so easily distracted, I forget....oh LOOK ! a PONY!

That was when I saw the film Julie/Julia and the brain-storm of this blog came to me and I took pictures as I worked through the third one. I thought, if I write it as a blog, I will have the whole thing to print out for my file. That was pretty smart.

The block is fun to make because you have to think..... When you make it, try to block out a good chunk of time to devote to it. You don't want to cut it out and have to stop to fix dinner or drop the car off at the shop.

For one thing, it has lots of pieces and Y-seams to deal with. You will need space as well as time to lay it all out before you start sewing. If you mess up and sew something in the wrong place, you will have to unsew and you don't want to go there!

Try to get good contrast when you choose your fabrics and watch out for directional fabrics...(you'll see in the next post) because that will mess up the look badly. (again, you can be a good example or a terrible warning for others. I tend to be both in this case)

As I have only made 3 out of 6, I will join you now and complete the second half. This is true as well to the remaining 6 blocks in the BOMb. All of the RedWhiteandBlues, the Oriental and the Christmas blocks are complete.

So I will wait a few more days before I post those shots. Hopefully I will have the other 3 completed by then.

Block 5 - Bear's Paws

Bear's Paws.... pretty straight-forward. No Y-Seams to deal with.


You can click the image to get a closer view for cutting instructions.

There is little for me to say about this block....You can make both the paws and claws the same fabric or mix it up a little to add texture/interest. Or make the center "cornerstone" a different fabric altogether. It's up to your design needs.

Here are my six blocks.


Friday, July 16, 2010

Block Four - Rolling Crosses - UpDated

Block Four is the third on the top row. I skipped it the last time because looking at it is enough to give you headache.

But sewing it is not bad, IF you break it down to 4 square units.

To guide you through it, I have cut my pieces exactly as the pattern depicts. Later, when you scroll down you will see how I chose fabrics for my six quilts and change them I did, with varying degrees of success. Or failure, depends how you want to look at it.

I suggested you print out the Pattern Pieces and use them as templates. UPDATE _ however, I can't seem to scan these as a PDF without the scanning device changing the dimensions. This is significant as if they are not correct and accurate, your block will not work out. SO ... Please click on the image and use the layout you see to either cut the fabric or make a template from which you will cut your fabrics.

As you cut them out, be sure to mark the corresponding Letters. "F" and "C" are very similar and you don't want to get confused. Like I did. (twice)(grrr)

You see the whole block laid out in the correct positions. Now is the time to make any changes you think will improve you final block.


Here is the first square. I like to make one by itself to make sure the pieces all fit together as they should. This saves a lot of time if in fact a mistake as been made.


Place the Dark "E" on top of the "F" and the light "E" on top of the "D". Sew the lines and press to the dark side. NOW if you have chosen to change the color sequences, just remember to press accordingly. You want, when these pieces join together later, that the seams are going in the opposite direction. This minimizes the bulk.


Place the "C" on top of the "F-E" unit and the "B" on top of the "D-E" unit. It is critical that you carefully align the pieces as centered as possible and sew the lines. (please note there is a slim portion of the "F-E" unit visible... this is as it should be).

Fingerpress to the dark side..

Align these two pieces right-sides together using the 45 degree intersecting seams as your point of reference. This intersection should match perfectly.
Sew these units together. Your "point" should look like this: (don't cut the "ear" yet!)
Press the seams to minimize bulk and your unite should look like this:


Now lay this final unit on top the "A" piece and pin. I like sewing with this unit face up so I can "hit" that center intersection exactly as I sew the final seam.

Again press to the dark side and you have one corner completed. The back should look like this:

Resist the urge to "square up" this unit.

Okay, if you are feeling pretty smug, go do the other 3 corners. If you had issues, either unsew all those seams and start over or do ONE corner again before you move on to doing all three simultaneously.

When you have 4 corners completed, it's time to assemble the block and here is where bias works in your favor. Place the upper right on top of the upper left and pin carefully, making certain the 1/4" seam meets perfectly at the center first and then to the top and the bottom of the sewline.


Please note that I placed a pin at the center and folded back the top and bottom corners so you can see the precision with which I pinned the layers.
You can gently pull the fabric to make them meet if they don't happen to hit it bang on, but obviously NOT if they are more than a smidge off. Bias can make you crazy but it can so be your friend.

As I sew these 4 units together, I press the seam allowance OPEN, like a butterfly's wings. At this point, there is no great way to minimize all that bulk so I press them open.
Yours should measure 16" square.

Take a look at the sample below and you will see that while the points are pretty darned good and perfect in some places, the outer joins are sometimes a tad skimpy. As long as I have at least 1/8" for a seam allowance along the perimeter, I call it good-to-go. If it is less, I pull the stitches out and figure out where I went wrong.

Here are the 6 for my Fabric Project:


So if you think you can take on this challenge, give me a day to figure out how to post the PDFs for the patterns you'll need.
Thank you for reading this far!